
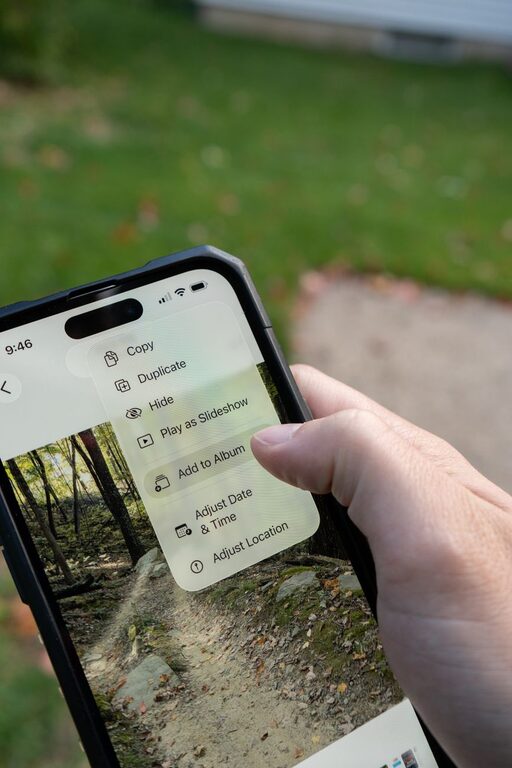
Your phone may hold thousands of photos, from important family memories to screenshots, receipts, downloaded images, and accidental duplicates. Without a simple system, finding one picture can become frustrating.
The good news is that you do not need complicated software or hours of work to organize your photo library. A few consistent habits can make your photos easier to browse, protect, and enjoy. This practical guide explains how to clean up your library and keep it organized over time.
Start With a Quick Photo Library Review
Before moving photos into albums or deleting anything, take a few minutes to understand what is on your phone.
Open your main photo app and look through the library. Notice the types of images you have collected, such as:
– Family and personal photos
– Travel pictures
– Screenshots
– Downloaded images
– Receipts and documents
– Memes and social media images
– Videos
– Duplicate or blurry photos
You do not need to organize everything in one session. A quick review helps you decide which parts of your library need the most attention.
If your phone has a search feature, try searching for common categories such as “screenshots,” “videos,” “pets,” or “beach.” Many modern photo apps can recognize objects, locations, and dates, which can speed up the sorting process.
Delete Unwanted Photos First
Removing unnecessary images is often the fastest way to improve your photo library. It also creates more storage space.
Look for photos that are:
– Blurry or poorly timed
– Nearly identical to better images
– Accidental pocket or background shots
– Outdated screenshots
– Unneeded downloaded pictures
– Photos of information you no longer need
– Videos you have already saved elsewhere
Review similar photos together and keep the best one or two. For example, if you took ten pictures of the same meal, landscape, or group, choose the clearest and most useful images.
Most phone photo apps move deleted items to a “Recently Deleted” folder. These files may remain there for several weeks, so empty the folder after you are certain you do not need them. If you are unsure about a photo, keep it temporarily and review it again later.
Use a Simple Decision Rule
When deciding whether to keep a picture, ask:
- Does this photo have personal or practical value?
- Would I miss it if it disappeared?
- Is it the best version of a similar image?
- Do I have another copy stored safely?
If the answer to each question is no, the photo may be a good candidate for deletion.
Create Albums That Have a Clear Purpose
Albums make it easier to find groups of photos without changing the main timeline. The best albums are simple and useful rather than overly detailed.
Consider creating albums based on:
– People
– Trips or events
– Hobbies
– Important documents
– Favorite photos
– Projects
– Seasonal memories
Use names that are easy to understand. “2025 Boston Trip” is more helpful than “Vacation Pics,” especially when you have several travel albums.
Avoid creating a separate album for every small occasion. Too many albums can make your system harder to use. Instead, group related memories together. For example, you might have one album called “Family Gatherings” rather than separate albums for every dinner or weekend visit.
Choose a Naming Pattern
A consistent naming pattern keeps albums easy to scan. For events, use the year followed by the subject:
– 2026 Spring Garden
– 2025 Family Reunion
– 2024 Weekend in Chicago
For ongoing categories, use straightforward names:
– Favorite Recipes
– Home Projects
– Pet Photos
– Travel Ideas
If your photo app supports shared albums, use them for group events where several people may want to add or view pictures.
Use Favorites for Your Best Photos
Favorites are useful for quickly collecting your most important or enjoyable images. Mark photos that you may want to show others, print, use as backgrounds, or include in a slideshow.
A favorites collection might include:
– Family portraits
– Best travel photos
– Photos of pets
– Special celebrations
– Important memories
– Images you use regularly
Try not to mark every good photo as a favorite. If the collection becomes too large, it will be less useful. Think of favorites as a short list of images you want to access quickly.
Handle Screenshots and Downloads Regularly
Screenshots and downloaded images can take over a photo library because they are easy to create and easy to forget.
Set aside a few minutes each week or month to review them. Keep only the images you still need, such as:
– Travel confirmations
– Directions
– Product information
– Instructions
– Messages or notes
– Reference images for a project
Delete outdated screenshots after the information is no longer useful. If an image contains information you may need later, consider transferring the details to a notes app or saving the original webpage instead.
Some phones automatically group screenshots, screen recordings, and downloaded pictures into separate sections. Use these sections during cleanup to avoid searching through your entire library.
Back Up Photos Before a Major Cleanup
Before deleting a large number of photos, confirm that your important images are backed up. Your phone may use a cloud photo service, a computer, an external drive, or a combination of methods.
Check that:
– Backup is turned on
– Recent photos have finished uploading
– You can view older photos from another device or through the service
– Videos are included if you want to keep them
– You understand whether deleting a photo from your phone also removes it from the backup
A backup is not a replacement for organization, but it protects your memories if your phone is lost, damaged, or replaced. For especially important photos, keeping a second copy in another location can provide extra peace of mind.
Organize Photos by Date and Location
Your phone usually records the date and time when a photo was taken. Many photo apps also save location information if that feature is enabled.
These details can help you find pictures without manually adding them to albums. Search for a year, month, city, or event to locate older images quickly.
If a photo has the wrong date or location, some apps let you edit the information. Correcting these details can make future searches more accurate, especially when you import older pictures from another device.
Be mindful when sharing photos that contain location information. If privacy matters, check your sharing settings and remove location details when appropriate.
Build a Small Maintenance Habit
Organizing your photo library works best as an ongoing routine rather than a once-a-year project.
Try one of these simple schedules:
– Delete unwanted photos once a week
– Review screenshots at the end of each month
– Create albums after trips and major events
– Check your backup settings every few months
– Review large videos when storage is running low
A five-minute cleanup can prevent hundreds of unwanted images from building up. You can also organize while waiting in line, traveling, or relaxing at home.
Make Your System Easy to Maintain
The best photo organization system is one you will actually use. Keep your rules simple, choose album names that make sense, and avoid spending too much time perfecting every detail.
Start with the biggest improvements:
- Back up important photos.
- Delete obvious duplicates and unwanted images.
- Remove old screenshots and downloads.
- Create a few useful albums.
- Mark your best photos as favorites.
- Set a regular review reminder.
Once these steps become familiar, your photo library will feel less crowded and much easier to navigate. Instead of scrolling endlessly, you will be able to find the memories, information, and favorite moments you want in just a few taps.